


Background
One of the first obstacles any new GraphQL developer faces is authentication. Since there are so many ways to authenticate a user it's not just an out of the box feature of a GraphQL server. It's not at all part of the GraphQL specification so it's generally up to you to implement the authentication method(s) your application(s) need.
In this series of posts we'll look at how to use JSON web tokens (JWT) in an exchange between an Apollo Client and an Apollo Server. This part focuses on the server code.
The code behind this post can be found on GItHub.
What is a JWT?
According to jwt.io:
JSON Web Tokens are an open, industry standard RFC 7519 method for representing claims securely between two parties.
A JWT token looks like a long string of gibberish, ex: eyJhbGciOiJIUzI1NiIsInR5cCI6IkpXVCJ9.eyJpZCI6MiwiaWF0IjoxNjY3MjY1NzAyLCJleHAiOjE2Njg0NzUzMDJ9.7fMjBItvx2fKx6s0Praly042onHP1i7v-iqRikEE8pc
Basically it's a JSON object that's been signed with a digital signature and base64 encoded - but not encrypted. It can be decoded by anyone but can only be signed by someone who holds the private key used. This private key must be kept secret to avoid 3rd parties generating fake JWTs.
Getting Started
Step 1 is to create a stand alone Apollo Server. If you are deploying using ExpressJS or as a Lambda then these instructions will change slightly. If you bribe me I might write additional posts covering those cases. The following is taken from the Apollo docs with virtually no changes save for the introduction of a context function and the use of dotenv to obtain environment variables from a .env file.
server/src/index.ts
import { ApolloServer } from '@apollo/server';
import { context } from './context';
import dotenv from 'dotenv';
import { resolvers } from './resolvers';
import { startStandaloneServer } from '@apollo/server/standalone';
import { typeDefs } from './typeDefs';

dotenv.config();

const server = new ApolloServer({
  typeDefs,
  resolvers,
});

const { url } = await startStandaloneServer(server, {
  context,
  listen: { port: parseInt(process.env.PORT) },
});

console.log(`🚀  Server ready at: ${url}`);
server/src/context.ts
The context function below is the critical piece of code. It looks for specific headers (x-access-token and x-refresh-token) in the request object and, if present, decodes and verifies them to determine the identity of the user making a GraphQL request.
import { setTokens, validateAccessToken, validateRefreshToken } from './jwt';

import { findUserById } from './users';

export const context = async ({ req, res }) => {
  // Note that 'null' may come across the wire as a string
  let accessToken = req.headers['x-access-token']?.replace(/^null$/, '');
  let refreshToken = req.headers['x-refresh-token']?.replace(/^null$/, '');

  if (accessToken) {
    const decodedAccessToken = validateAccessToken(accessToken);
    let id = decodedAccessToken?.user?.id;

    if (!id) {
      // access token may have expired so check the refresh token
      if (refreshToken) {
        const tokenUser = validateRefreshToken(refreshToken)?.user;
        if (tokenUser) {
          /* refresh the tokens and make them available through headers to the client
           * this allows the client to transparently get refreshed headers without
           * requiring a separate GraphQL query request */
          id = tokenUser.id;
          ({ accessToken, refreshToken } = setTokens(tokenUser));
          res.set('x-access-token', accessToken);
          res.set('x-refresh-token', refreshToken);
        }
      } else
        console.info(
          `Invalid/expired access token presented but refreshToken null or missing!`
        );
    }
    /* if we've found an authenticated user, add the user object to req for access by resolvers via req.user
     * this includes *all* the user's fields but none of this goes back to the client unless requested via a graphql query */
    if (id) req.user = findUserById(id);
  }
  return { req, res };
};
A few details are worth pointing out:
- The
accessTokencould be present but expired. In that case we check therefreshTokento see if it still valid. If it is we create a fresh set of tokens and put these on theresobject so that they will be sent back to the requestor as headers. - If the
refreshTokenis present but expired the user will not be authorized - If either token is valid then the user's
idis extracted from it and then the completeuserobject is found and added to the currentreqobject. This makes it available to all resolvers for access management.
server/src/jwt.ts
This code handles the nitty-gritty of JWT tokens.
// function to set jwts
// see https://www.richardkotze.com/coding/json-web-tokens-using-apollo-graphql

import { compare } from 'bcrypt';
import jwt from 'jsonwebtoken';

const { sign, verify } = jwt;

export const setTokens = ({ id }) => {
  // if you want to include more than the user's id in the JWT then include it here
  const user = { user: { id } };
  const accessToken = sign(user, process.env.ACCESS_TOKEN_SECRET, {
    expiresIn: process.env.ACCESS_TOKEN_DURATION,
  });
  const refreshToken = sign(user, process.env.REFRESH_TOKEN_SECRET, {
    expiresIn: process.env.REFRESH_TOKEN_DURATION,
  });
  return { id, accessToken, refreshToken };
};

// the following two functions wrap verify() in a try/catch to muffle expired jwt errors
export const validateAccessToken = (token: string) => {
  try {
    return verify(token, process.env.ACCESS_TOKEN_SECRET);
  } catch (error) {
    if (error.message !== 'jwt expired')
      console.error(`Access token error: ${error.message}`);
  }
};

export const validateRefreshToken = (token: string) => {
  try {
    return verify(token, process.env.REFRESH_TOKEN_SECRET);
  } catch (error) {
    if (error.message !== 'jwt expired')
      console.error(`Refresh token error: ${error.message}`);
  }
};

export const comparePromise = (password: string, hash: string) =>
  new Promise((resolve, reject) => {
    compare(password, hash, (err, result) => {
      if (err) reject(err);
      else resolve(result);
    });
  });
The login Mutation
Now that we have some scaffolding built, we need to allow a user to login. To that end we add the following to our typeDefs:
"""
  JWT tokens
  """
  type Tokens {
    """
    id is the id of the associated user
    """
    id: ID!
    accessToken: String
    refreshToken: String
  }

  type Mutation {
    login(username: String!, password: String!): Tokens
  }
The login mutation returns a pair of tokens and an id which we'll define to be the ID of the user. In other words it gives the client everything it needs to make future authenticated requests.
server/src/login.ts
import { comparePromise, setTokens } from './jwt';

import { GraphQLError } from 'graphql';
import { findUserByUserName } from './users';

export const login = async (_: any, { username, password }) => {
  const user = findUserByUserName(username);
  if (user && (await comparePromise(password, user.hash)))
    return setTokens(user);
  else
    throw new GraphQLError('Invalid credentials', {
      extensions: { code: 'UNAUTHENTICATED' },
    });
};
With some users defined in server/src/users.ts we can run a test login. This yields:
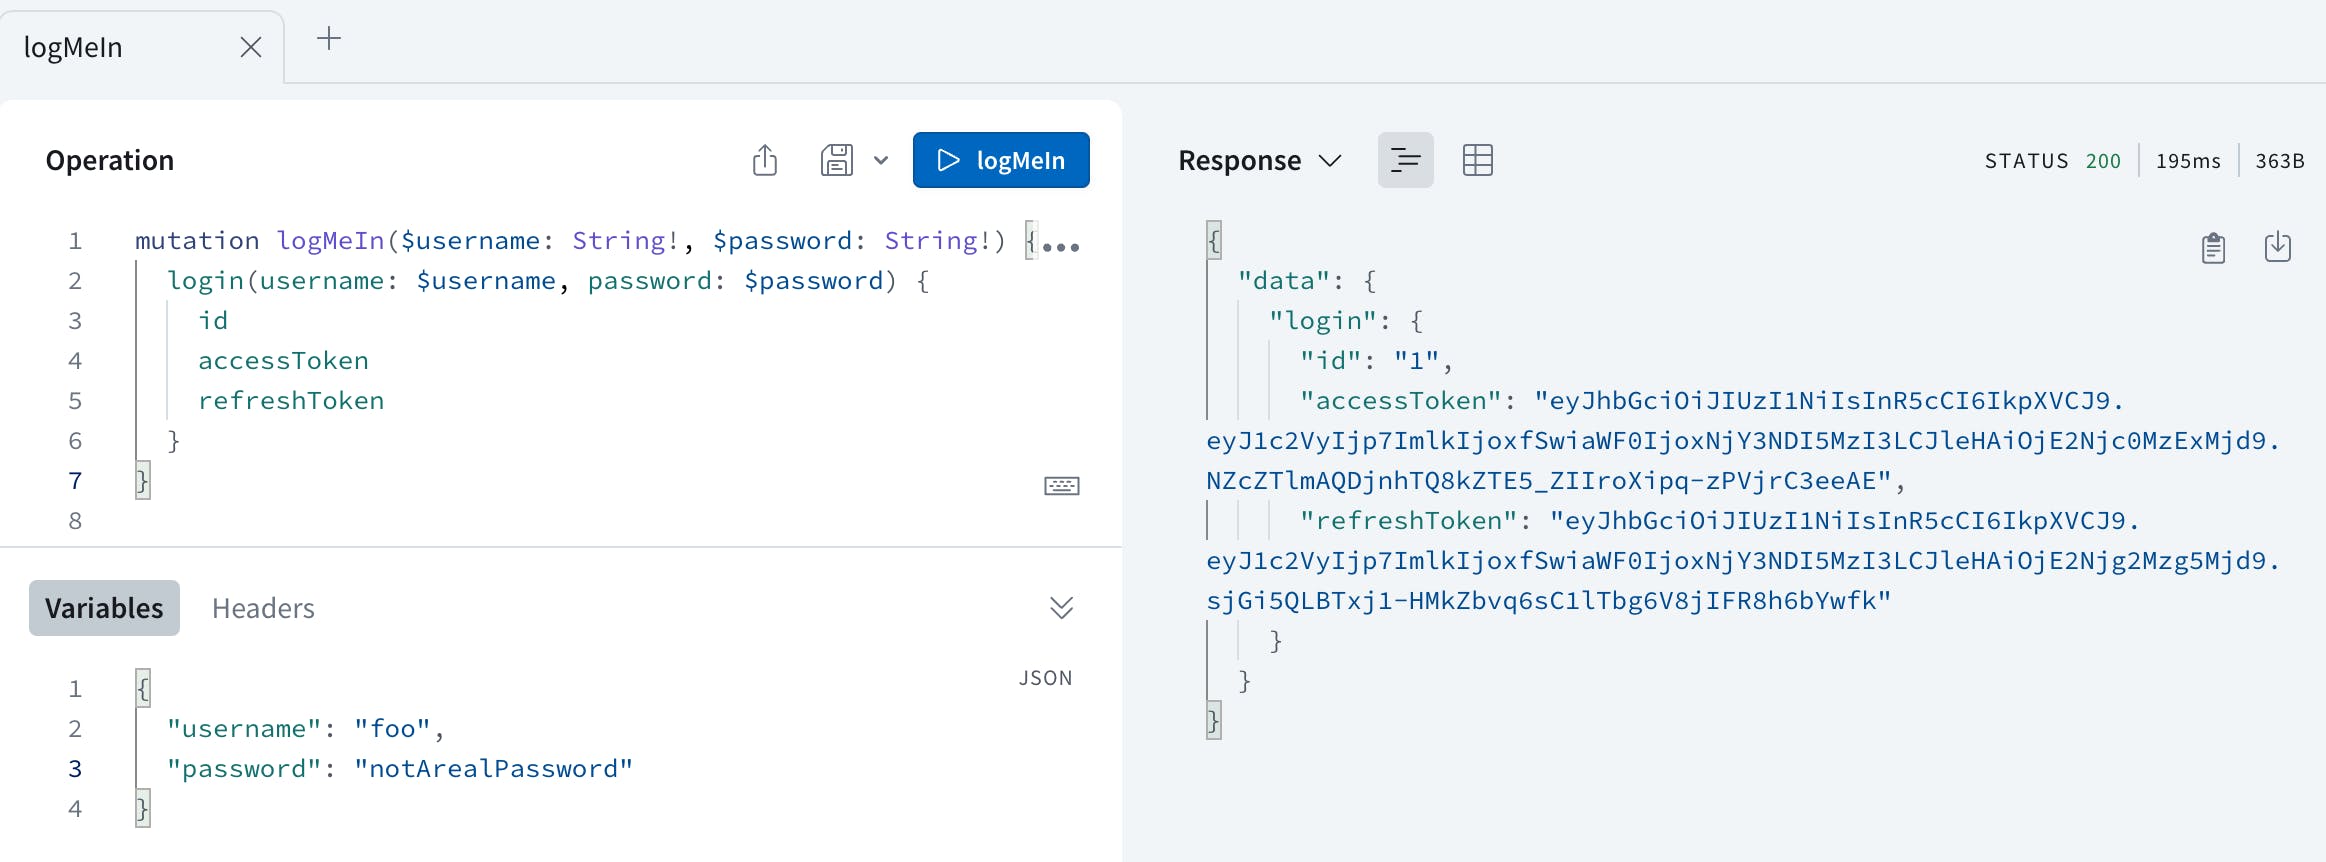
If we copy the value of the access token we can validate it on jwt.io and get:
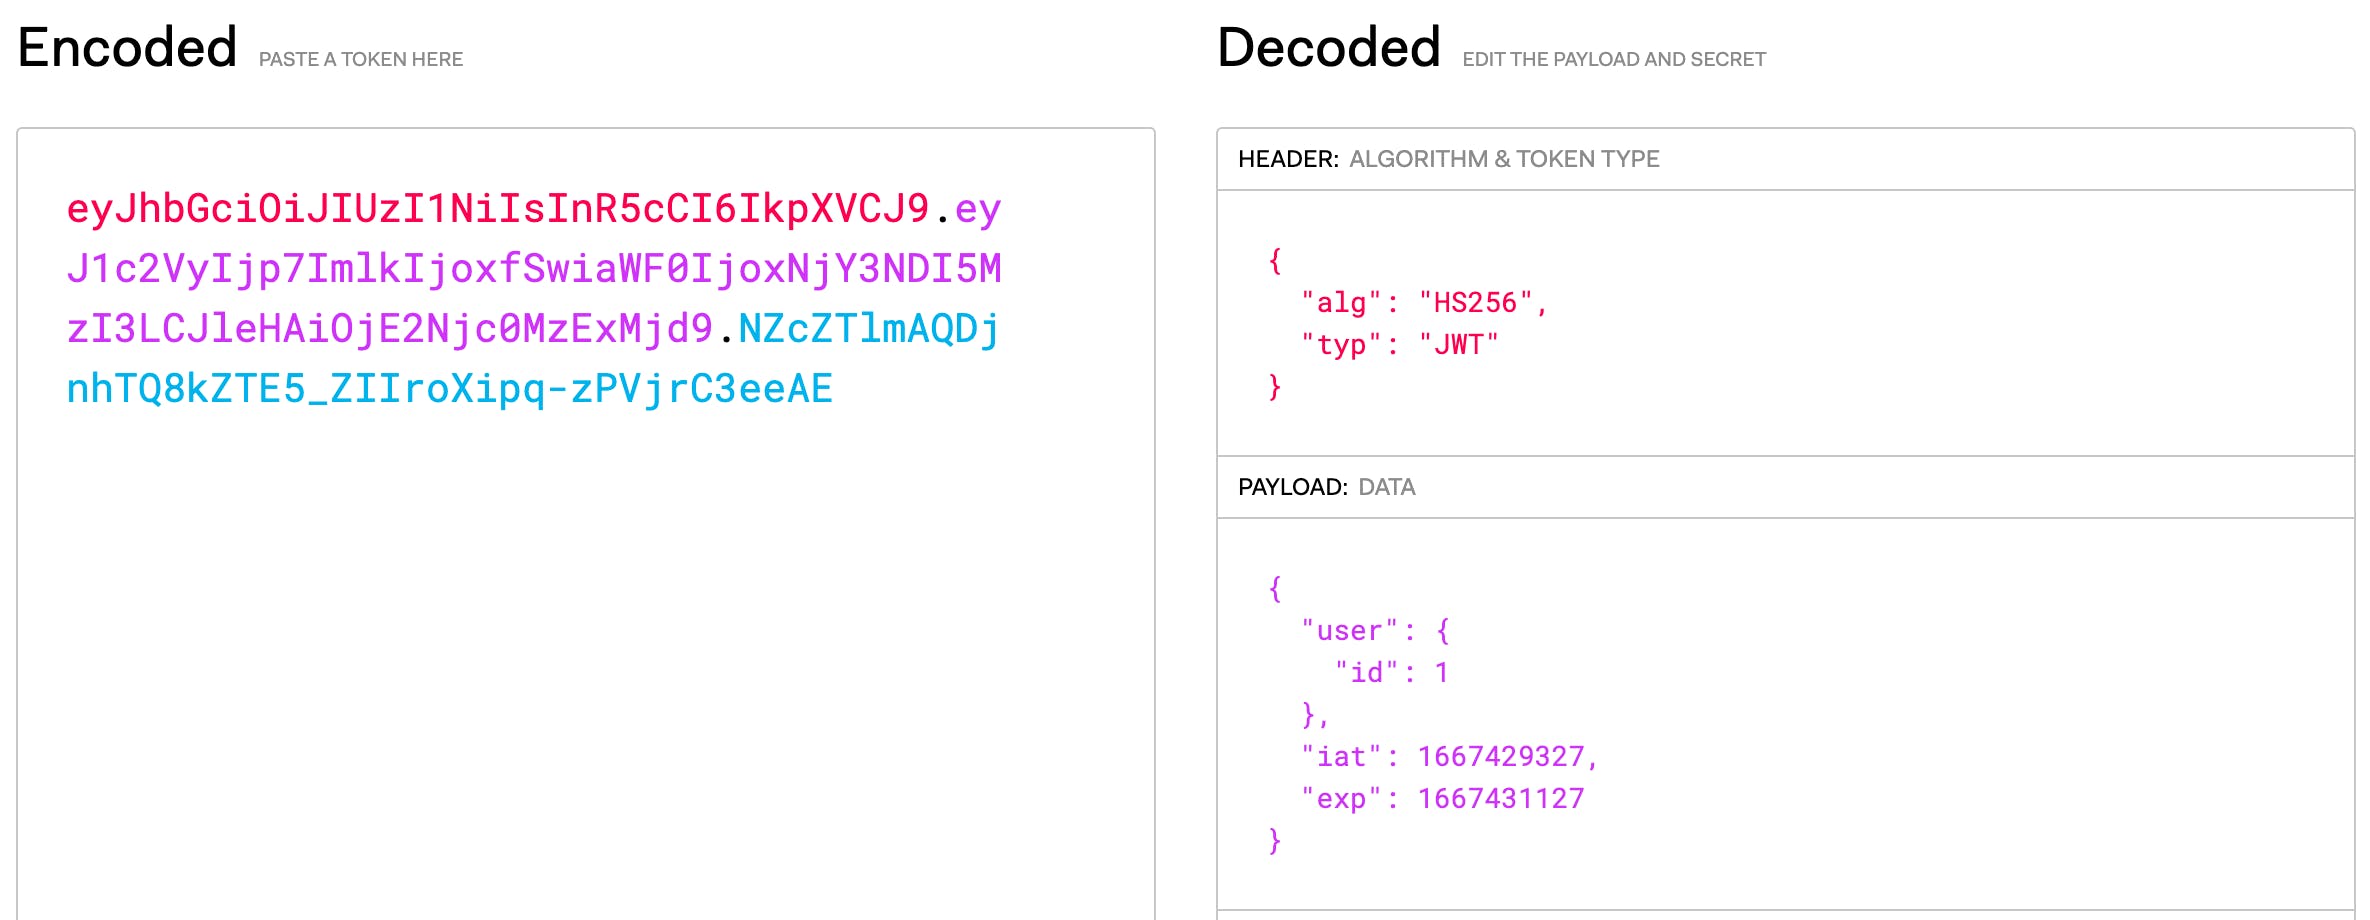
This demonstrates that we've successfully encoded the user's id into the JWT.
And that's about it as far as generating tokens and looking for them in the request header! In part 2 we'll build a simple React-Native app that uses Apollo Client to authenticate against our server.